Monday, August 20, 2012

Yet Another Junk Journal / Smash Journal

Okay, this junk journal (I know, another one - I seem to be into journals lately) I made for a darling little girl in our neighborhood for her birthday.  This paper is so fun to work with that its hard to go wrong.  In this journal I used paper from the Street Lace paper pad (DCWV) and from the Tiffany Paper pad (We R Memory Keepers).  The pages are 6x9 and the cover is simply chipboard with patterned paper; and the journal is bound using my Bind-it-All.  I found the cutest stamp set at Hobby Lobby (50% off so it was only $1) by inkadinkadoo (I'll put a picture at the end of this post). Sorry my pics are not so great, I uploaded them directly from my phone using the blogpress app instead of to the computer so  and they seem a bit blurry doing them that way, but I figure at least I'm getting them posted (I may do the second half the regular way).  So here it is (in all it's glory) Tia's Journal:


Inside cover and patterned paper page:


Back side of patterned paper and half sheet of plain white for journaling or pics (behind the half sheet is the back side of another patterned paper page:


Patterned paper page and pocket page (there are tons of tutorials on youtube on how to create this, but basically you fold your paper up how far you want the pocket (and fold the corner down either in or out if it's two-sided paper) and then in half with pattern on the outside.  You put adhesive on the bottom (binding will seal the side) and viola . . . a pocket page:


Back side of pocket page and another pocket page (side pocket) which is just folded in half with adhesive on top and bottom edges and a tag inside:

Back of side pocket page and composition book paper (cut down and corners rounded) stamped on first page:


Last page of composition book papers and patterned paper (glitter butterfly - love this paper!):

Back side of patterned paper (stamped image in corner) and a journaling spot cut from the glitter butterfly page and behind that another simple pocket page (just folded in half):

Okay, these pictures are better, so here are the last few pages of the journal:


Oops!  I forgot to add the stamp set - here it is:


Thanks for checking out my journal!
Make today count ~
Wendy

Saturday, August 18, 2012

Ticket to Ride Robin's Nest DT Project

This project was kind of a spur of the moment gift. That's what I love about the versatility of Robin's Nest paper. My boss and I were at a local office supply store and she was looking for something to put her tickets and itinerary (as well as passport and other travel papers) for her upcoming trip to Spain. We couldn't find anything that was the exact size she wanted. Sooooo, I came home and created this:


Using the Damask Black and White cardstock I distressed it much as I did my last project, using several different shades of distress inks. The glossy raised pattern allows you to do whatever you want to the paper without interfering with the pattern. I absolutely LOVE the way it came out! I started with just two sheets of the paper and what I ended up with looks like an old world pocket book.


I made it 10" wide and 5.5" tall to make sure it was large enough to hold folded in half sheets of standard paper. I fitted it with 1.5" gussets to make sure it was deep enough to hold passports as well. The pictures below show my progress. This project was really simple but elegant. As I mentioned in my post of the tropical mini album, Robin's Nest paper is a really sturdy grade paper or you wouldn't be able to do this knowing that it won't fall apart. As you can see in the pictures, I did put strips of tape over the score lines (on the inside) so that the areas that are opened and closed don't start to crack or fray with wear and tear. I assume this will be opened and closed many, many times during the trip. I also lined it with the left-over pieces of patterned paper and some solid black cardstock just to give it a finished look when you open it.


Once I completed the pocket book itself, I embellished it with some of the Glitter Leopard Print cardstock (which of course I inked up a bit) to create a luggage tag. I added a couple of other embellishments and a luggage strap made from ribbon and voila . . . a finished project that I'm hoping my boss will love for her trip!


Thanks for checking out my project! Don't be afraid to play with Robin's Nest paper - there are so many things you can do with it. If this wasn't going to be for an actual trip, I can just imagine the darling travel mini album I would tuck inside. The possibilities are endless.


~Make Today Count

Wendy

Thursday, August 16, 2012

Hawaii or Bust Mini Album Class at Timeless Treasures

What:           Hawaii or Bust Mini Album Class
When:          August 25, 2012; 12 noon to 4:00 p.m.
Where:        Timeless Treasures in Rancho Santa Margarita

Check out the picture of the cover below . . . you got it!  We are using an expired Hawaii license plate for the cover of this quirky, tropical album. 

Call Timeless Treasures to reserve your space now!
949-8887151


Wednesday, August 15, 2012

More Pages from the Travel Junk Journal

We've been so busy I haven't had much time to complete the pictures in my journal yet, but here are two more pages.  The first is a glossy, coated, lunch back (from the $1.50 section at Michaels).  I folded the top portion over and in to a point  and then added my own closures.  Inside I stored the "extra" pictures we took of Whitewood Creek (I took way too many but didn't want to get rid of any of the angles - so this gave me the storage I needed in my album.  I loooove it! 


This page is the back side of one I showed earlier which contains the pocket with the US map in it.  This was created from a Tim Holtz paper that I thought was perfect since we tracked license plates on the map tag.  We were only missing about 4 by the end of the trip (well 6 if you count Hawaii and Alaska).  In the pocket I've just tucked pictures from the first leg of our drive.  On the tag I will be including the dates covered by the pictures and the places we stopped.


Thanks for stopping by.


~ Make Today Count
Wendy


Saturday, August 4, 2012

Summertime Porch Swing


This project is to show the versatility of Robin's Nest paper (and just a fun, frivolous, summertime project). I created this swing from cardboard and covered it with the Glitter White on White Swirl paper which I love, love, love! Below are some pictures of the project as I created it. But the beauty of this paper is that you can ink it any color you desire and because of the white on white resist, you still have the gorgeous white swirls and glitter. I love the way it takes on an upholstery look when used on this swing. Once you cut your paper the shape and/or size you desire, simply ink it up with a sponge or dauber. I finished my project off with some floral trim. My favorite way to use Dew Drops is for flower centers. I use so many flowers in my projects and the flat backs of the Dew Drops (link above) make it so easy to give your floral trim a finished look.  I got the idea for this project from sacrafters on youtube.  She has a ton of fabulous tutorials that she just makes up as she goes.  She is so imaginative!  I love her videos. 


Thanks for looking at my project and don't forget to pick up some Glitter White on White Swirl paper (I would consider it a staple - one that you can make your own and can fit into any project)! Stay tuned for my next project which just might be a mini album to sit in the swing.  Be sure to visit the Robin's Nest blog and website to find some of these fabulous supplies.

~ Make Today Count
Wendy

Thursday, August 2, 2012

Travel Junk Journal - a Few More Pages

I guess I should have started these posts with some info on creating this junk journal eh?  I'm a little backwards, what's new . . .

This journal is pretty eclectic (to say the least).  I have used so many different paper lines and products, I couldn't begin to list them all.  So, that being said, if there is anything specific you want to know about, please message and ask me - I am happy to figure it out if I don't know off the top of my head.

This page is a pocket page I created by adhering two pages together back-to-back (leaving the top open of course).  These I actually adhered using Tim Holtz tissue tape on the bottom and right and binding on the left.  This is the first "real" page and shows the van at 10:00 p.m. just after I'd finished packing it.  There is not one small nook or cranny left to be found - we are packed solid!  I embellished this page with a die cut that looks like my minivan (I got the die at scrapbuck.com for $1 and since I do have a van, even if I only use it a couple of times, it's way worth it), and some cut outs from a patterned paper pack and one sticker from a Simple Stories sticker sheet.

This journal has different sized pages and pockets.  The page below is a tag (5x7) for a 6x9 pocket page.  The tag itself contains a map of the US (minus Alaska and Hawaii).  As we drove through a state, my 8 year old colored in that state.  As we spotted license plates on our drive, we circled them on our map (we did pretty well I think).  On the flip side we listed the places we stopped along the way.


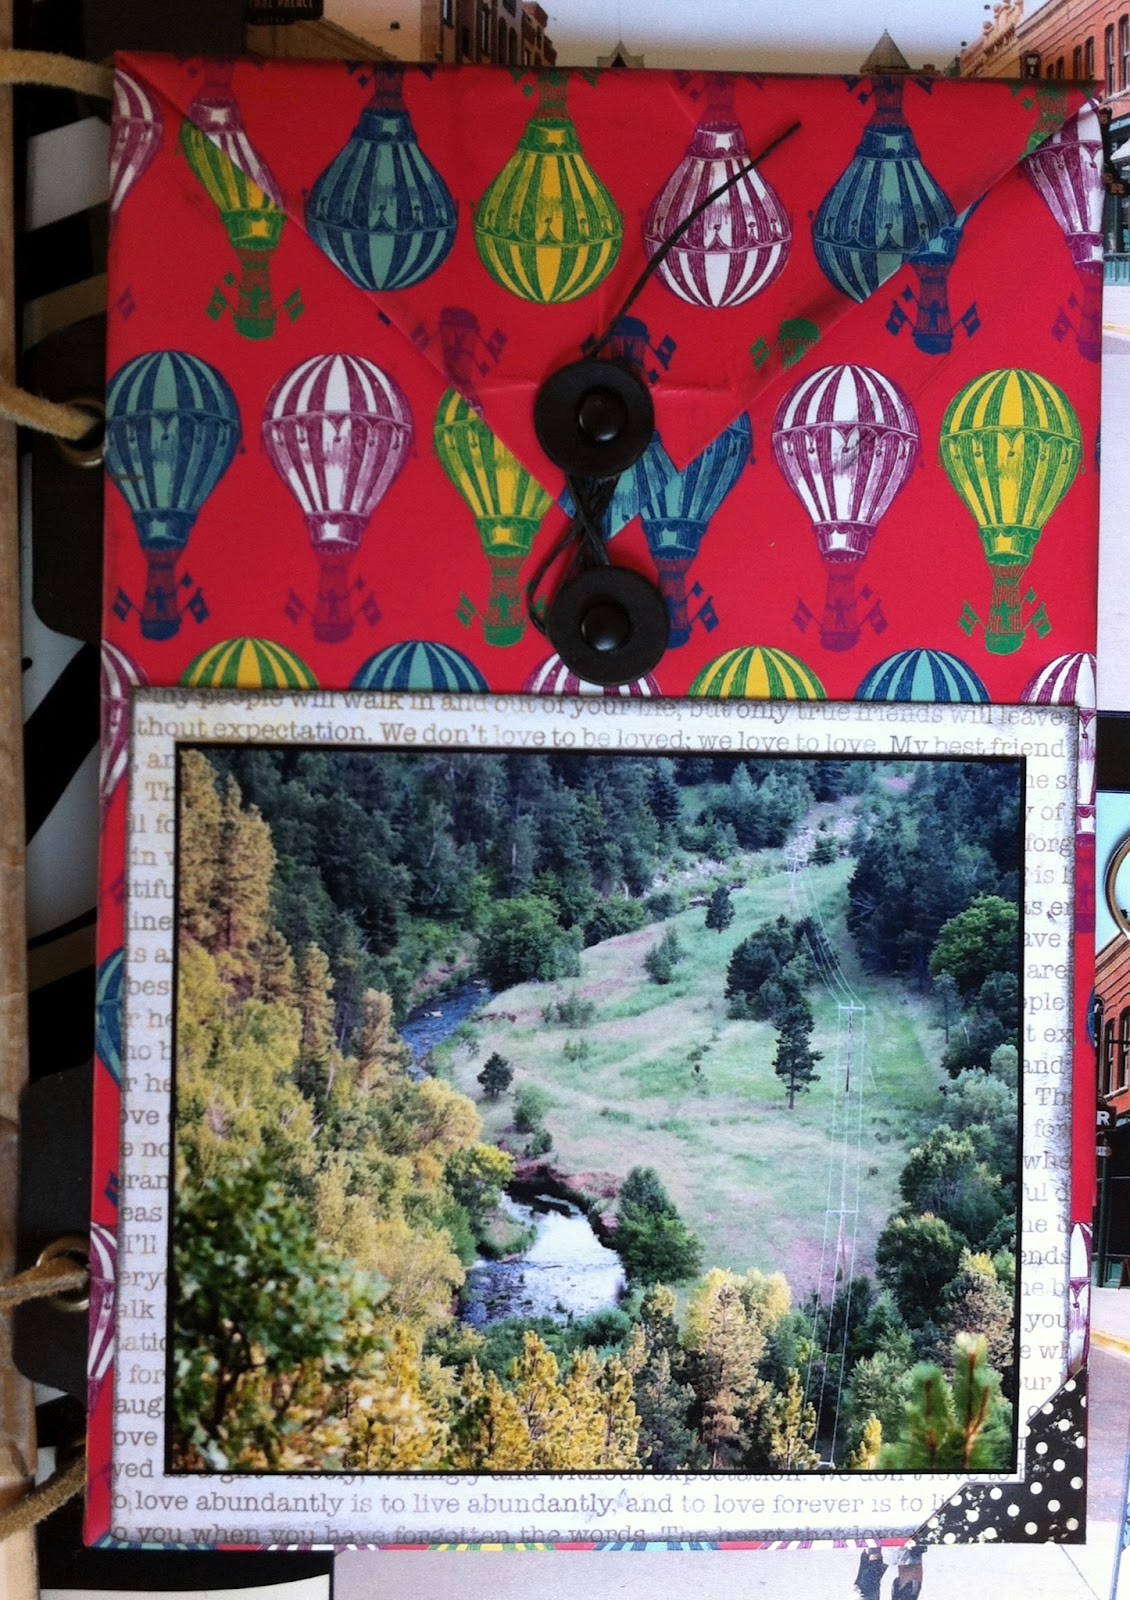
This page is a plain (well except for the busy pattern - lol) piece of scrapbook paper (not a pocket page).  To create the pocket I simply trimmed a mini paper bag and use my circle punch at the top.  I used a faux Polaroid and some misc. embellishments to create kind of a collage.


I love this page . . . not even for the pictures, but that I love the file folder!  I used a zebra file folder and cut the fold off (about 2"), took a few inches off of the end as well, and then adhered it back together with Scor tape where the fold was as well as at the two sides which are now the top and bottom.  I used a distressed mini file folder label from Simple Stories and a matching zebra binder clip.  That's it.  These photos are my son at the start of Main Street in Deadwood, South Dakota.  Yes, yes, I know how well those shorts go with the whole cowboy look.

This page is the back side of the pocket page with the loaded minivan picture.  Driving along the road in Kanosh, Utah, we spotted a twister and I caught a picture with my phone (um . . . you just don't see those in the OC).  I merely added a journaling tag (plain white cardstock) and a cutout from patterned paper.


So those are my pages for today, I have a couple more finished that I will post soon.  But on August 5th I will have my new Robin's Nest DT project posted.  Be sure to come check it out.

~ Make Today Count
Wendy