Friday, November 8, 2013

Prima Doll Tag - Birthday Card for Friend

So I bought my first two Prima Doll stamps because I love what I've seen other people doing with them and needed to try my hand at it too!


Well . . . what do you think?  I absolutely love the way she came out!  I created this for my friend's birthday (her favorite color is purple).  I found this paper pad at Michaels and knew I had to get it and hold it to make her something.  It has the most beautiful peacocks and feather prints, several of them in shades of purple.  This is the paper pad:


I used patterned paper adhered to the front and back of a chipboard tag (I painted the edges of the tag with purple paint first).  Then I stamped, texture pasted and went all Lindy's Stamp Gang on it.  After it dried, I inked the edges and added my Prima Doll whose dress and stockings are also from the paper collection.  She has a bit of crocheted lace, a fabric scarf and a touch of glossy accents on her hair and shoes.

I finished off the tag with some I AM Roses, a stick pin I made with beads from my stash, a stamped note (Stampin' Up), a Recollections bling border, some charms from my stash and one I made from a Tim Holtz acrylic fragment circle with paper from the collection, some baker's twine, ribbon and seam binding and voila!

On the back side I added a pocket (Sizzix die) with a friendship stamped image (Stampin' Up) with my birthday note inside.  Here is a picture of the back:


And here is her gift with the tag on the top:


I was quite pleased with the final outcome (and I think my friend was too!).
 
Thanks for stopping by
 
 
~  Make Today Count
Wendy

Monday, October 28, 2013

Baby Boy Diaper Bag Mini Album


Thanks for viewing stopping by to look at my Diaper Bag Baby Boy Mini Album. I created this album for a friend. The couple having the baby are not into really cutesy stuff, so I used this paper pad that’s just a but more edgy than your average baby paper. I really love the way it turned out.

You can see more of the album in the youtube video:


I used the hinge binding (Laura Dennison’s I think - but I’ve seen it so many times on youtube that I’ve lost track of where it started).

The thimble charm tassel I saw here: http://www.youtube.com/user/gladysgarden (she has some fabulous videos - take a look).

The micro mini album I saw here: http://www.youtube.com/watch?v=-OJkbRmMMeE&list=FLipu2K09pXKN1KZpXxPYbpQ


The album itself I just created like you would any mini except that I added the purse handles and the paper / buckle closure (it has a magnet under the buckle so you don’t have to actually unbuckle the paper strap). There are 7 page sets. Each page has front/back, a large fold out flap and a large side pocket with a tag. I’ve embellished only the pages you see when you flip through without opening the flaps so that inside the flaps they can include full sized pictures of the baby (either 5x7 or 4x6). There is room for 28 full size pictures plus what will fit on the embellished pages (another 14+) along with the 20 + various sized tags throughout the album (some as large as 4x5). With the hinges leaving a full half inch between pages, you can fit A TON of pictures in an album like this!

Thanks again for stopping by!

~ Make Today Count

Wendy

Tuesday, October 15, 2013

Baby Carriage and Mini Album

I've been holding off posting this because it is a gift for my niece and her new baby (and with the sickness in the family, we haven't been out to see the baby yet).  But, I decided, that she's probably so busy with the baby that she's certainly no looking at my blog (I hope).  So, even though these are not great pictures (taken with my phone right after I finished it), I'm posting them as a "sneak peek."


I created the carriage from chipboard and design paper (the wheels from ribbon spools).  It's just big enough to fit the mini album inside.  I really love how it turned out.  The canopy actually opens and closes since the strips are held in place with brads.  The wheels actually turn too.  The design paper is Basic Grey "Out of Print."

I'll have to post some better pictures taken with my camera now that it has the baby's name and some cute charms hanging from the carriage push handle.  I am really excited about how it came out though.  It was fun to create and will be even more fun to give to my niece!

Thanks for checking out my carriage!

~ Make Today Count

Wendy


Friday, October 11, 2013

Halloween Apothecary Cabinet


Okay, I know these pictures are not the best, but I took them at night with a really crappy light.  But I just love how it turned out so I'm gonna post these pictures even though they are not good and then maybe I will put some better ones up later lol. 


See . . .  blurry and yellow light . . . ugh!  But I took these quickly with my phone instead of using the camera, so that made a difference too.  Now I know I saw the idea to use the legs on the side on someone else's project, but I can't give credit because I can't find the one I saw.  So if I lifted this idea from you, let me know and I will give you credit and put a link to your project as well.  I think this little cabinet came out so cute.  I found it at a local thrift store (for like $.46) and painted it.  The paint treatment is hard to see, but I have been wanting to try it on a bigger piece of furniture and thought I would start small. 


The look I was going for was kind of like this one:


I think I got close but I didn't sand the edges at the end.

Then I just added all sorts of fun stuff inside.  I made the little books using a tutorial on youtube (http://www.youtube.com/watch?v=TnhKe7BLRJQ).  I just altered the size to make them even smaller to fit in my cabinet.  The little book on the bottom is like a small file with tiny photo mats inside to put kids' Halloween pics. 

Thanks for stopping by to take a look at my Halloween Apothecary Cabinet!

~ Make Today Count
Wendy


Thursday, October 3, 2013

Pictures Coming

If you are visiting my blog to view pictures of the Haunted Mansion Halloween Mini Album for sale in my Etsy shop, I will post them tomorrow.  In the meantime you can see the album in the YouTube video below.


Thanks for stopping by!

~ Make Today Count

Wendy

Tuesday, October 1, 2013

Haunted House and Halloween Mini Album Sneak Peek


Okay, this is totally a sneak peek because I am not finished with this yet.  I have a skeleton to go in the balcony of the haunted house and my album is near complete.  What do you think? Leave me a comment and let me know.  I started with a plain paper mache house from Hobby Lobby like this one:


I gave it a few coats of paint (okay, I painstakingly applied layer after layer until I got it just right lol), a balcony made from chipboard scraps, ragged cloth curtains in all windows, a chipboard door with real metal hinges and a door pull, not to mention spider webs and tombstones and voila!  You have a haunted mansion perfect for housing my Halloween Mini Album.  Here are a couple more pictures:
 
Close-up
 
 
The one below shows the inside.  I put "wallpaper" and a hanging picture on the back wall because with a couple of battery operated tea lights you can see through the windows.  I painted the entire inside black before installing the curtains and adding "wallpaper."


Now for a sneak peek at the album . . .wait  . . . for . . . it . . .
 
 
~
 
~
 
~
 
~
 
~


So . . . what do you think?  I totally love it.  Of course I agonized over the cover like I always do, layering things on top trying to figure out if I was going to like it, because the minute you glue it down there's no turning back.  But I really do like how it turned out.  So here's what's piled on . . . 
 
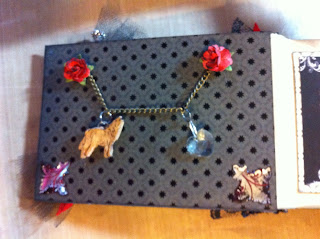
 The two metal corners are die cut from metal tape and dry embossed using my sizzix.  After that I added layers of emboss enamel and paint and then chipped some off to look really worn.  The skeleton hand has been painted and distressed and wiped off again.  I added three layers of lace to look like a vintage sleeve.  I also added a jump ring with a rhinestone to create a ring.  The skeleton is cut from design paper and embossed using an embossing stylus to give it some depth (of course I also adhered it with pop up tape for more height).Under the hand and skeleton is a black rose trim with a bit of black crocheted lace peeking out from just under the edge.  I have added two stick pins I created using various beads from my stash, a teeny tiny glass vial with green "poison" in it (the lid is glued in) a frame I created with Amazing Mold Putty and Resin with a glitter spider from design paper, I Am Roses flowers and skeleton leaves colored with Lindy's Stamp Gang Starburst sprays, some bones and a tiny skull from my stash, a title tag from design paper, and to finish it off, a Tim Holtz door knob. 
 
Whew!  I think that about does it for the cover.  Since I didn't show the spine, I don't have to tell you about that yet lol.  I will be selling this house/album on Etsy or Ebay so when I show the finished product I will give all of these details again for anyone who is interested.  Wait until you see how chunky this album is . . . I think the spine is 5" wide (I need to measure).
 
Well, there's the sneak peek, thanks for stopping by.  Be sure to comment and let me know what you think.
 
~ Make Today Count
 
Wendy
 

But We Were on a Break!

I know it's been awhile since I've posted, but in the words of Ross Geller . . . "but we were on a break . . .!"  All kidding aside, between closing shop (the attorney I work for has retired and aside from a few lingering cases we are finishing up we are closed), a Kern River camping trip, a Vegas trip with my bestie and her family, a three week road trip (main destinations Durango and Cripple Creek Colorado with many stops along the way) and my son starting a new charter school, it has been a doozy of a summer (yeah, yeah I know summer is over and it's really fall already).  But now that kids are back in school and I'm trying to get a hold of my new schedule of being a glorified taxi (my 16 year old is in a hybrid independent study/online school through our district where I still have to haul him around to labs, language and for tests several times a week to the old district office (in another city).  So, that being said, I am going to start posting again regularly and start showcasing some of my recent projects. 

My first post (after this one) will be a sneak peek at my Haunted House and Halloween Mini Album (I think I will do a YouTube video on that one too).  It is almost finished and I think it is coming out fab! 

My next post will probably be a gift I made for my niece who just had a baby.  I don't want to post it before I give it to her because I'm afraid she might see it (although she probably doesn't follow my blog lol).  This one I am really excited about because it came out so stinking cute!  I created the mini album first, then when I got the idea to make a baby carriage to house it, I had to size it around the mini album.  It turned out to be a good fit, except that the next one (that's right I'm gonna make more!) will be a bit wider so that I can embellish the album front more.

Before I go, here is my favorite road trip 2013 photo of my boys and Gidget.


So, all that to say I'M BACK!  Stay tuned . . .

Thanks for stopping by!

~Make Today Count
Wendy

Tuesday, May 21, 2013

Little Boy Blue ~ Robin's Nest DT Project

Some of the items we are featuring this month at The Robin's Nest are the new Special Delivery Baby sets.  I chose the Special Delivery Baby Boy set for my project.  I decided to do a one page, 8 x 8 layout and showcase it in a square frame.  I absolutely love the way it came out!


I used the following items in my post (click below to see the paper on the Robin's Nest website):


I started by distressing a piece of blue cardstock by sanding it and then adhering it to a piece of chipboard.  Next, I cut a rectangle out of the Rocking Horse Specialty Paper (no measuring, just a quick couple of cuts).   I cut various pieces from the Special Delivery Boy Paper and used distress ink to age them.  My cut pieces were all triangle type shapes (nothing exact).  I glued the Special Delivery paper (face down) to the underside of the opening in the Rocking Horse paper (wide end glued down).  I then used a few different trims I had in my stash to surround the opening, and then glued the smaller end of the Special Delivery pieces down around the trimmed out area.  I completed my layout by adding a "Little Treasure" tag  and then adhering the Rocking Horse portion to the solid cardstock  portion and then adding the piece as a whole to my frame.  I just love the colors and the way the frame gives it such a finished look. 


In these last pictures I added a piece of scrap paper to show how you would just insert your photo and glue it down . . . or I was thinking about gluing a mini clothespin at the top of the opening so that you could even change out the photo.  What do you think?


Make sure to leave me a comment and let me know what you think.  Thanks for stopping by; make sure to hop over to the Robin's Nest Website to check out the New Baby Boy and Baby Girl Special Delivery sets.

~ Make Today Count
Wendy

www.scrappinwendysway.blogspot.com

Tuesday, May 7, 2013

Ride On 4 Page Layout ~ Robin's Nest DT Project

This month we are featuring the Robin's Nest Hot Flame line. I have some pictures of my youngest son riding a Harley Davidson toddler scooter that I know will go perfectly with this paper.  With that in mind, I created this 4 page layout.  I used:


I think this paper is the perfect match for my little biker!  The paper was a little bright for what I was doing, so to tone it down a bit I made a "wash" with gel medium in a matte finish and added a couple of drops of white paint and a couple drops of yellow ink.  This gave me exactly the look I wanted.  It was a more washed out, old look. 

For the far right page I used the Mango Flame Border paper for the background.  I created a pocket from plastic packaging.  I used another portion of the Mango Flame Border cardstock and fussy cut the flames so that I could adhere them to the clear pocket so that I had a place to add a large tag. Adding the fussy cut flames above the patterned cardtock give the page a little more depth and more interest when your tag is out of the pocket.  The second from the right page is a neutral page with a tag backed in Mango Cardstock given the same "wash" treatment.  This pulls the pages together.


The second page from the left was created using the Mango Flame - Thermal Icing as the background.  The paper has so much interest that you really don't need to do too much with it.  I simply added a filmstrip die cut with a an insert to attach the photos so they can be pulled out revealing the patterned carstock behind.  I might even put two more photos behind the tag so that this page can now hold 4 pictures.  The first page from the left is another neutral page with a Harley Davidson sticker to finish it off. 


My hot tip for this project is to use aluminum plumber's tape.  I ran it through my diamond embossing folder and voila . . . faux diamond plate!  I love the way this finishes off the layout.

Keep an eye out on my blog as I post more pictures using the Robin's Nest Hot Flame line.  Make sure you hop over to the Robin's Nest website and check out all of their fabulous products.

Thank you for checking out my project!  Be sure to leave me a comment and tell me what you think.

~  Make Today Count
Wendy

www.scrappinwendysway.blogspot.com

Tuesday, April 23, 2013

Robin's Nest Blog Hop Winners!

THANK YOU

Our Design Team was so thankful for all the wonderful comments that were
posted on all of their blogs.  
As a team, I know we had fun making our project and reading your comments.  
now it's time to pick some winners:

Each Teammate got to pick one winner from their blog
each of these winners will win
$15 toward the on-line store for 


Robin WINNER is: StampinCarol
robinscreationsofjoy.blogspot.com
:
Terri Sproul  WINNER is:  Alice Charles
http://www.terrisproul.blogspot.com

Mandi Holmes WINNER: Lynda Jeffs
Blog: http://mjskraze.blogspot.com/

Barbara Rankin  WINNER is:  Debi Minter
My Blog address:  http://blackholeartstudio.blogspot.com/

Juraci Falcucci Winner:  Lyneen
blog: http://ju-scrap.blogspot.com.br

Brenda Burfeind WINNER is:  Embley Veronica embleyveronica@evnoechel.com
http://Createbyburffrau.Blogspot.com

Michelle Hodges
winner is Amy #8546. 
Blog:  http://www.iluvscrapping.blogspot.com

Danie May  Winner:  Janis
blog: http://www.d-dazzledscraps.com/

Dawn Mercedes Barrett
 http://dawnmercedes.blogspot.com
WINNER: 
 reflections:0) said...
I like them all but, I am loving that tall card. Flexie:0)


Camille Short - WINNER is:  marylouh
Blog:  http://shortonideasaz.blogspot.com/

Genevive Badila WINNER is: Sandra Caldwell
Blog: http://scrappingcrazy.blogspot.sg

Marília Lopes WINNER IS:Debra Lovell https://plus.google.com/100710155526652673167/posts
Blog:http://mariliallopes.blogspot.com

Wendy Cuskey  Winner:  CTgirl
Blog:  www.scrappinwendysway.blogspot.com

  Michelle Frae Cummings   WINNER is Genevive.
http://scrappingcrazy.blogspot.com/
http://faeriedustdreams-michelle.blogspot.com/

Sherri Welser- Winner is Giavanna Lau!!
http://indigoearth-indigoearth.blogspot.com/


Tonya Wilson WINNER IS: Rhonda Helm
http://creativeaddictiontopaper.blogspot.com/


Clare Dempsey WINNER IS:  Cheryl 
http://www.cricutcraftyclare.blogspot.com/

and our GRAND Prize winner is: Pammejo

Please email us @ robinsnestscrap@gmail.com if you are a winner.
And Congratulations! Thanks for Hopping!

Thursday, April 11, 2013

Twilight Mini Album ~ Last Pages

Okay, if you have been following or waiting for the last pages of my twilight mini album, here they are!  If you missed the first couple of posts you will have to go back to check them.


Another look at the cover. 


Kind of chunky! 


Thanks for stopping by!  Leave me a comment and let me know what you think.

~ Make Today Count
Wendy

Sunday, March 31, 2013

Summertime Place Setting ~ Amazing Mold Putty DT Project

Hi all! For my project this month I decided to concentrate on summertime table settings. With spring in the air and my husband readying the back yard pond and fountains and patio for guests, I wanted to create some fun new napkin rings. So out came my Amazing Mold Putty and Amazing Casting Resin (links below).


To start, I had to search for something to use as a base. I chose the cardboard center of a (or spool) of a roll of ribbon. Then, to give it some texture and depth I used my glue gun to add some stings of glue all over it.


Next I mixed my Amazing Mold Putty part "A" and part "B" in equal parts (see website via the link for detailed instructions).

Next, I made molds of this and some other items to use on my napkin ring.


Once my putty was set (about 10 minutes - or when you can scrape the side with your fingernail and it doesn't come off). The detail I was able to get in my mold was really quite amazing. With all of the mold I've created, I still wasn't sure this would work, but just look at the next picture to see how detailed you can actually get with your putty.
Is this cool or what!?
Next I used my Amazing Casting Resin to mold my pieces.
Now, I'm not gonna lie, the ring itself took a little work to get out, but it was totally worth it. Once I popped the pieces out I glued them together and then painted them solid black.


I went over the black with a blue green color, then a seafoam green. I finished it off with some antique gold rub.


What do you think? I love how this looks like some high end metal napkin ring that I might have bought in downtown Laguna Beach; but really I made it lickety split in my craft room. Now I just need to make 7 more! Thanks for stopping by and checking out my project. Please leave me a comment and let me know what you think. Don't forget to hop over to the Amazing Mold Putty website and check out their truly Amazing products!
~ Make Today Count
Wendy